In this article, we will show you how easy it is to include Switchit’s Digital Business Card in your Gmail or Microsoft Outlook email signature.
A personalized eSignature is a great way to end an email because it gives the recipient more information about you, your business and how you can be reached. An email signature is an extension of your brand. Be creative and include text, images, your digital business card or even a logo.
Without further ado, let’s dive in!
Create an email signature in Outlook
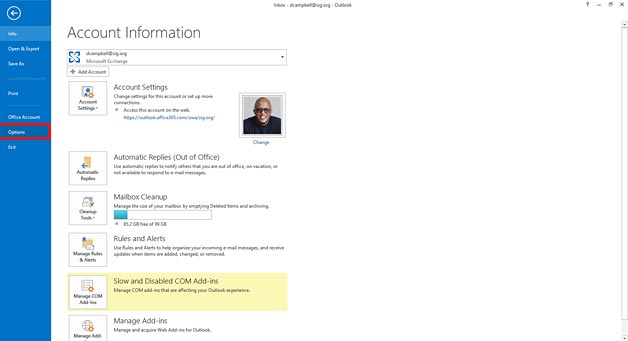
Step 1: To begin, open Microsoft Outlook. In the top left corner, click the File tab. Then click Options in the side menu.
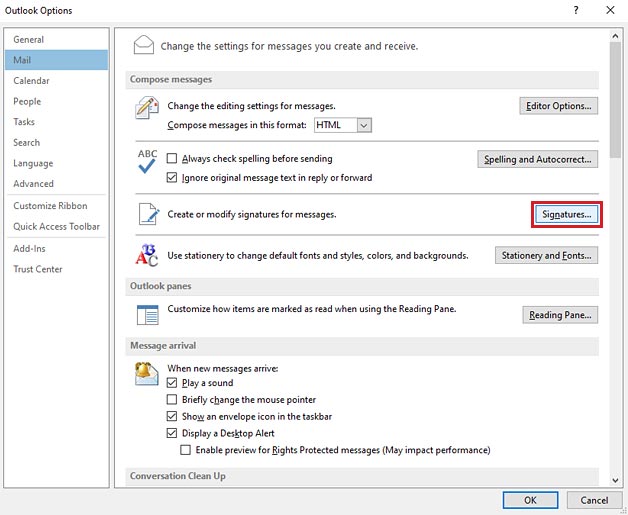
Step 2: Next, click Mail. Now you want to click Signatures in the Create or modify signatures for messages section.
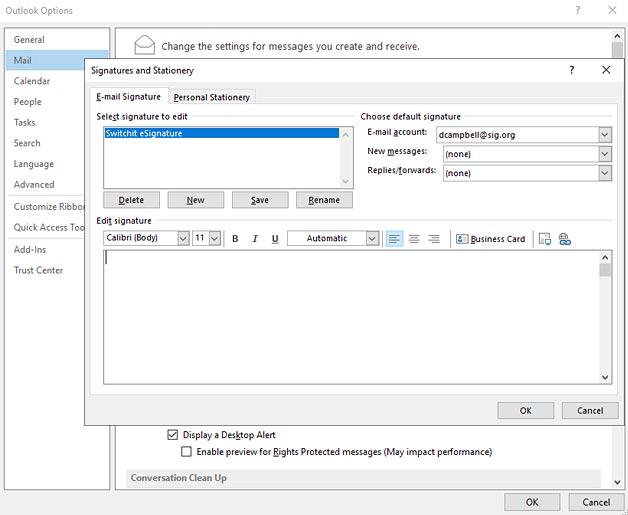
Step 3: To create a new signature, click New in the Select signature to edit field area. You will be prompted to give your new signature a name. After naming your signature, click OK.
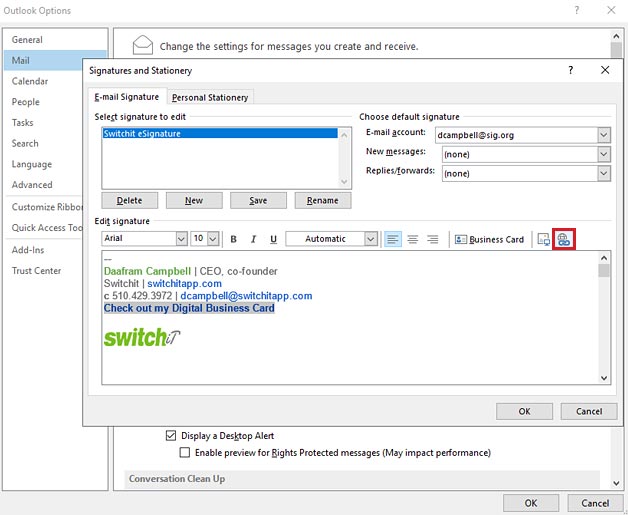
Step 4: Now you can begin creating your new signature by moving the cursor to the Edit signature section. In the text field area, type/format your signature’s text, add an image, logo or the link to your Switchit Digital Business Card.
To add your Digital Business Card, I suggest using a long or short-text sentence, then hyperlink the text with your card’s unique URL.
For example, use a sentence such as Check out my Digital Business Card or View my contact information.
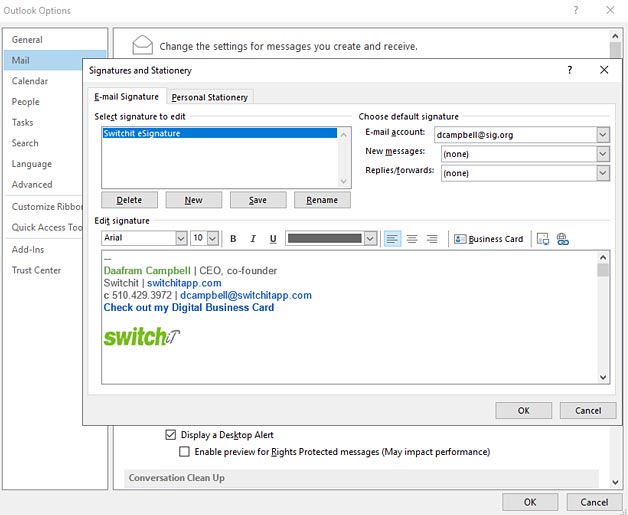
Once you have chosen your sentence or phrase, highlight the text then click the Globe + Link icon on the far right side.
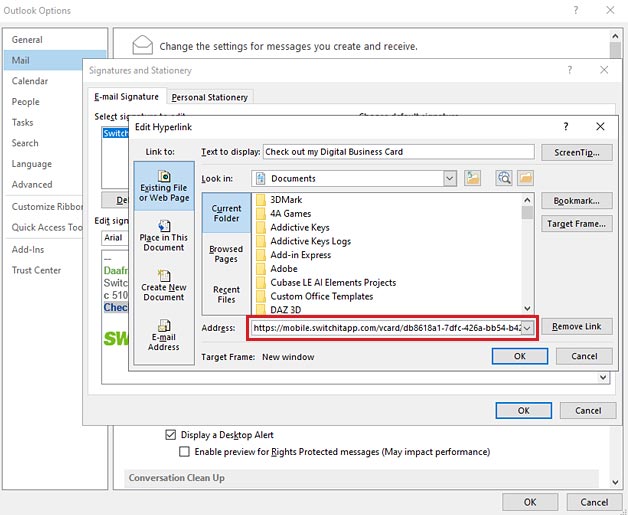
Paste your card’s link in the Address: section. Click OK.
Please note: To access your digital card’s URL, use Switchit’s QR Code Generator. Go to the Dashboard screen, tap the Social Media button then tap QR Code.
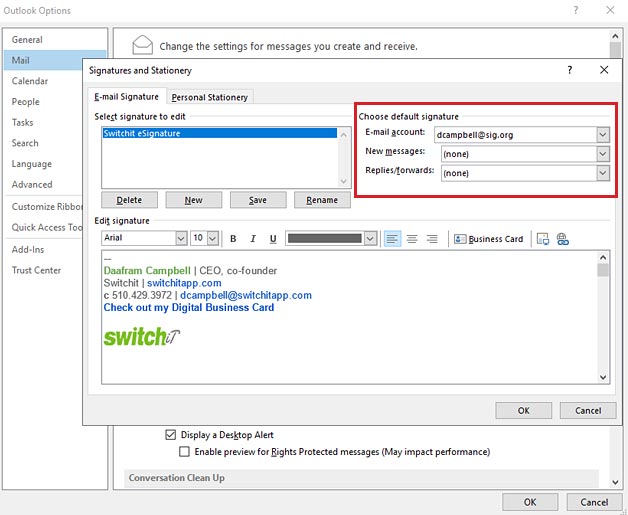
Step 5: In the Choose default signature section, select the email account to associate with the signature, if applicable.
Finally, using the drop-down menus, select the new signature to appear appended in New messages and(or) Replies/forwards. You can also leave this option as (none).
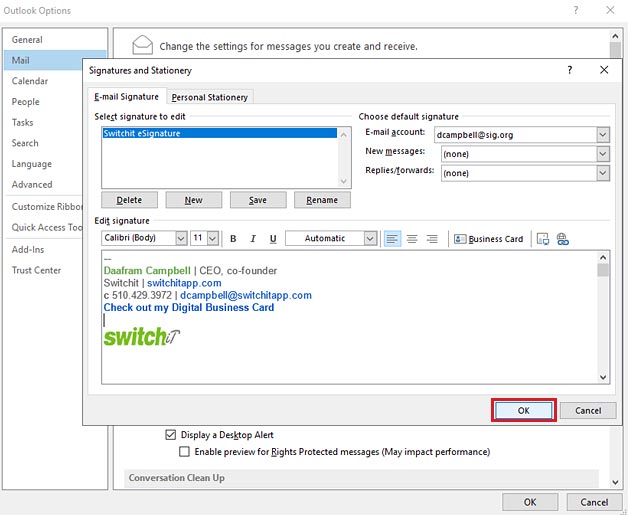
Step 6: Click OK.
Create an email signature in Gmail
Step 1: To begin, open your Gmail account. In the top right corner, click the Settings icon, then click Settings in the dropdown menu.
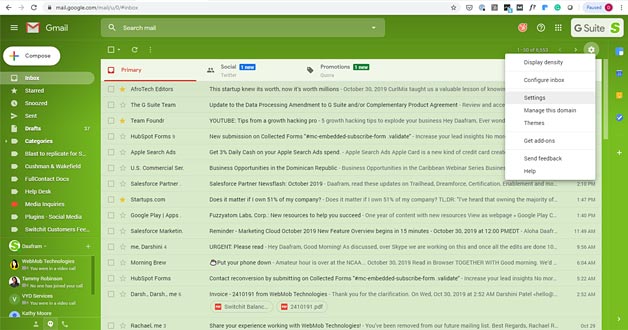
Step 2: Scroll down the screen until you see the Signature section.
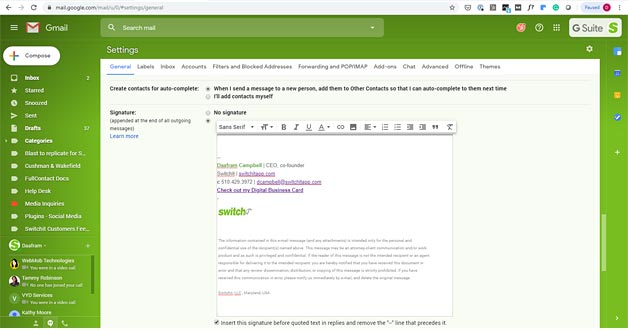
Step 3: Now you can begin creating your new signature by moving the cursor to the text box area. In the text field area, type/format your signature’s text, add an image, logo or the link to your Switchit Digital Business Card.
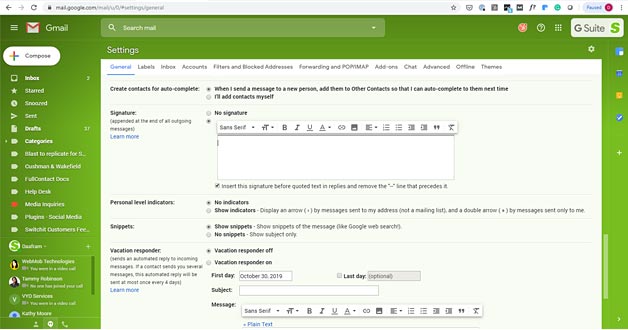
To add your Digital Business Card, I suggest using a long or short-text sentence, then hyperlink the text with your card’s unique URL.
For example, use a sentence such as Check out my Digital Business Card or View my contact information.
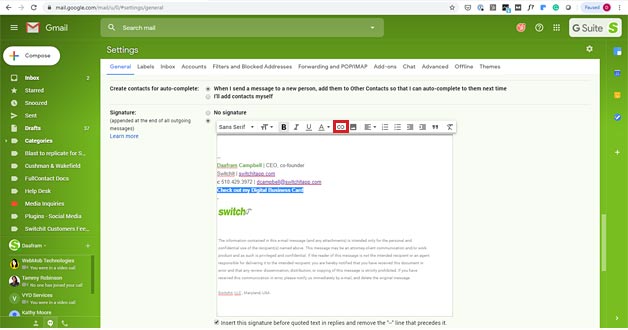
Once you have chosen your sentence or phrase, highlight the text then click the Link icon located in the top menu. Paste your card’s link in the To what URL should this link go? area box. Click OK.
Please note: To access your digital card’s URL, use Switchit’s QR Code Generator. Go to the Dashboard screen, tap the Social Media button then tap QR Code.
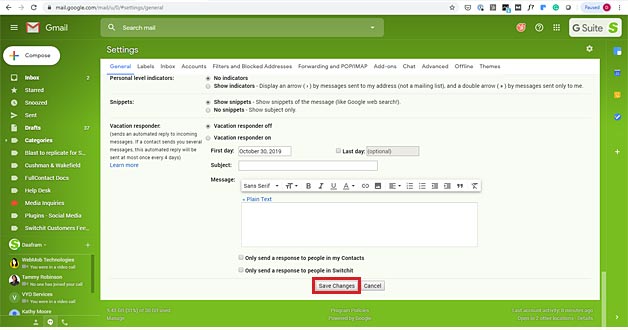
Step 4: If you are satisfied, scroll to the bottom of the page, click Save Changes.
⇒ Please note: By default, all hyperlinks in Gmail signatures are underlined and cannot be altered.
Now when you send an email with your awesome new eSignature, recipients can view the contact information and marketing video contained in your Switchit Digital Business Card.

Leave a Reply